


bvddobb
Top Poster
VIP Member
We have decided to upgrade our T5 top bed lattice rost to a disc spring system like available in the T6.1 series.
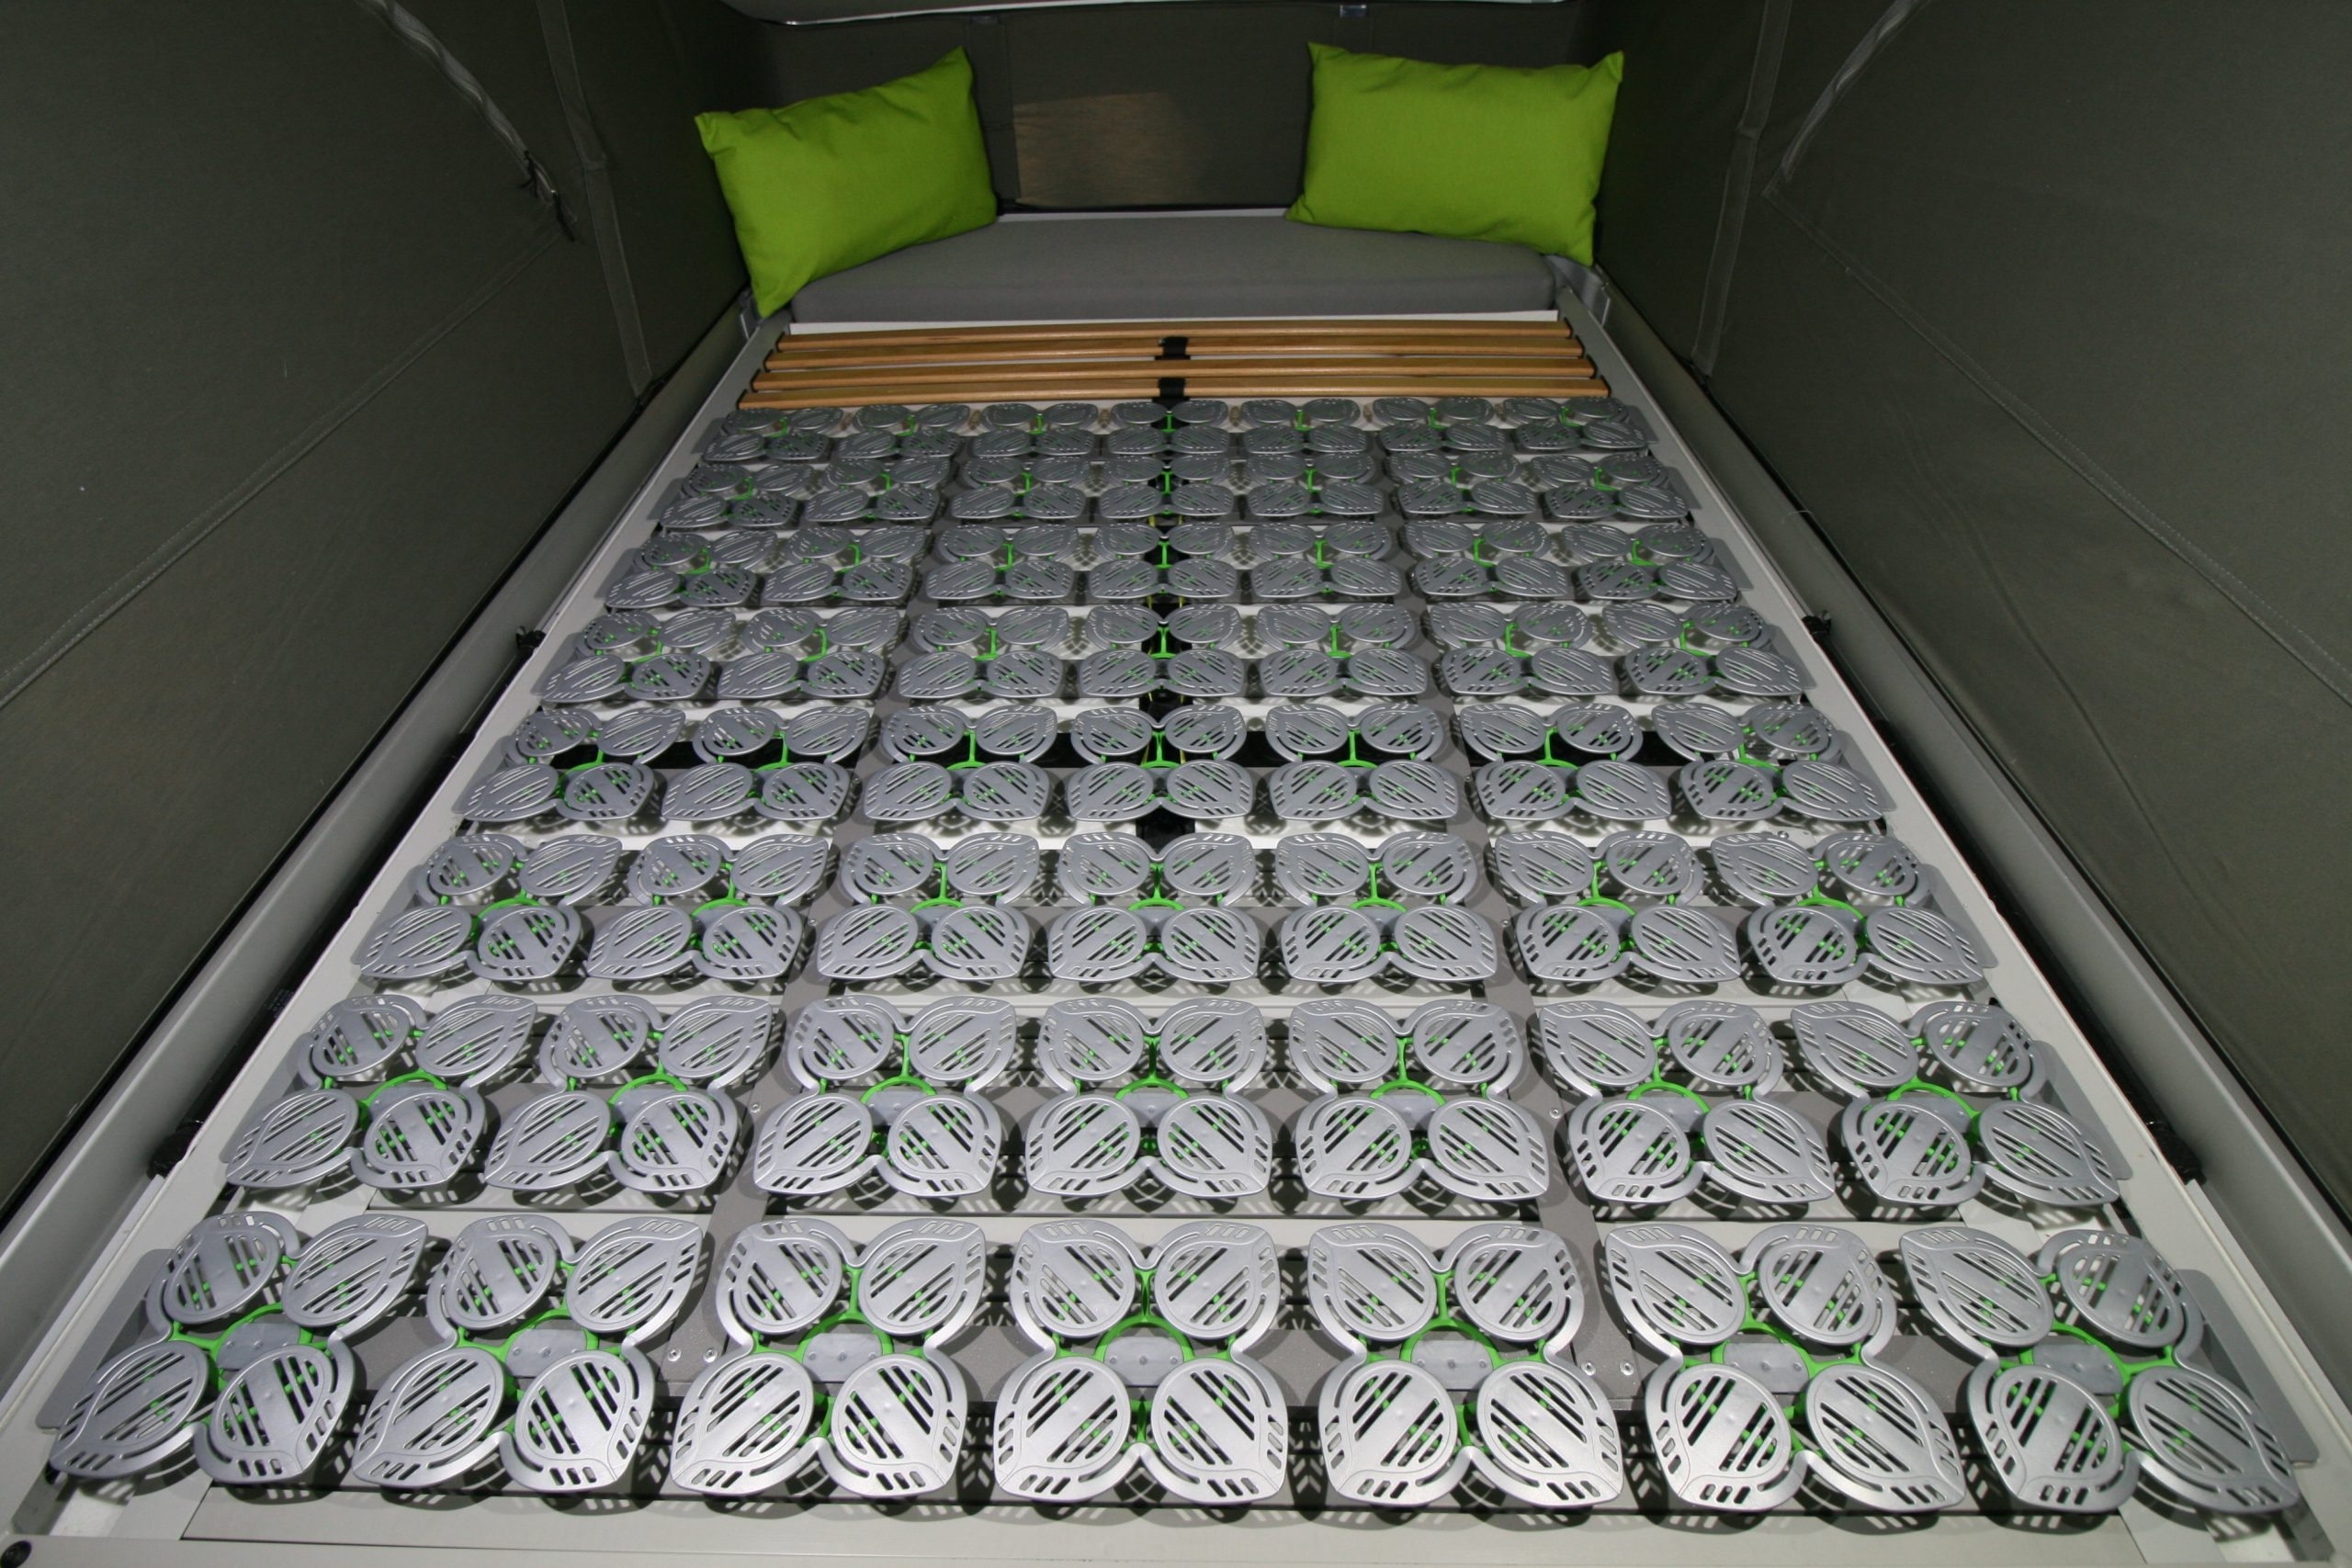
We nearly always sleep upstairs on our Calibed Roof II mattress and until recently we slept very well. But since Marga's back hernia she was less comfortable and of course the lattice rost has always had one big inherent issue: the 'coupling' of sleepers upstairs. If one turns, the other bobs up-and-down. The disc spring system is said to be more comfortable and it solves the 'coupling issue'.
By now, VW offers an upgrade set. Here, we can have it for about € 600.-, incl. installation. Already very soon after VW's announcement of the 6.1, the german firm Squergo offered an upgrade kit. Incl. shipping it costs around € 320.- and supposedly it can be installed by yourself in about 1.5 hrs, without the need to remove the roof tent or inner roof lining. It looks like this:
Since the announcement of the disc system by VW, an extensive thread emanated on the german Caliboard forum about the possibilities of an upgrade.
The common opinion there is that the Squergo system is more comfortable and versatile than the VW upgrade. The Squergo system has a bigger spring depth and can have a thicker mattress than the VW system. Also, Squergo offers different disc springs (weaker/stronger, higher/lower springs), so one can more easily adapt the system to individual needs, e.g. more or less lumbar or shoulder support, etc. The german forum has a good story about a man weighing 120 kg with a wife weighing 60 kg who can now both sleep comfortably upstairs without the bed being too soft for the one, or too hard for the other. The VW system cannot be adapted to individual needs.
So, we decided to go for the Squergo system.
Those who know us better know we are not THAT versatile DIY'ers, but this little Youtube movie gave us the necessary trust we could do it:
So we have ordered the upgrade kit from Squergo, ordered a riveting thingy from Amazon (?? never riveted anything in our life before...), everything supposed to be delivered the coming week... Then wait for a morning or afternoon of good weather so we can put the van in front with the roof up, and go to work...
To be continued...
We nearly always sleep upstairs on our Calibed Roof II mattress and until recently we slept very well. But since Marga's back hernia she was less comfortable and of course the lattice rost has always had one big inherent issue: the 'coupling' of sleepers upstairs. If one turns, the other bobs up-and-down. The disc spring system is said to be more comfortable and it solves the 'coupling issue'.
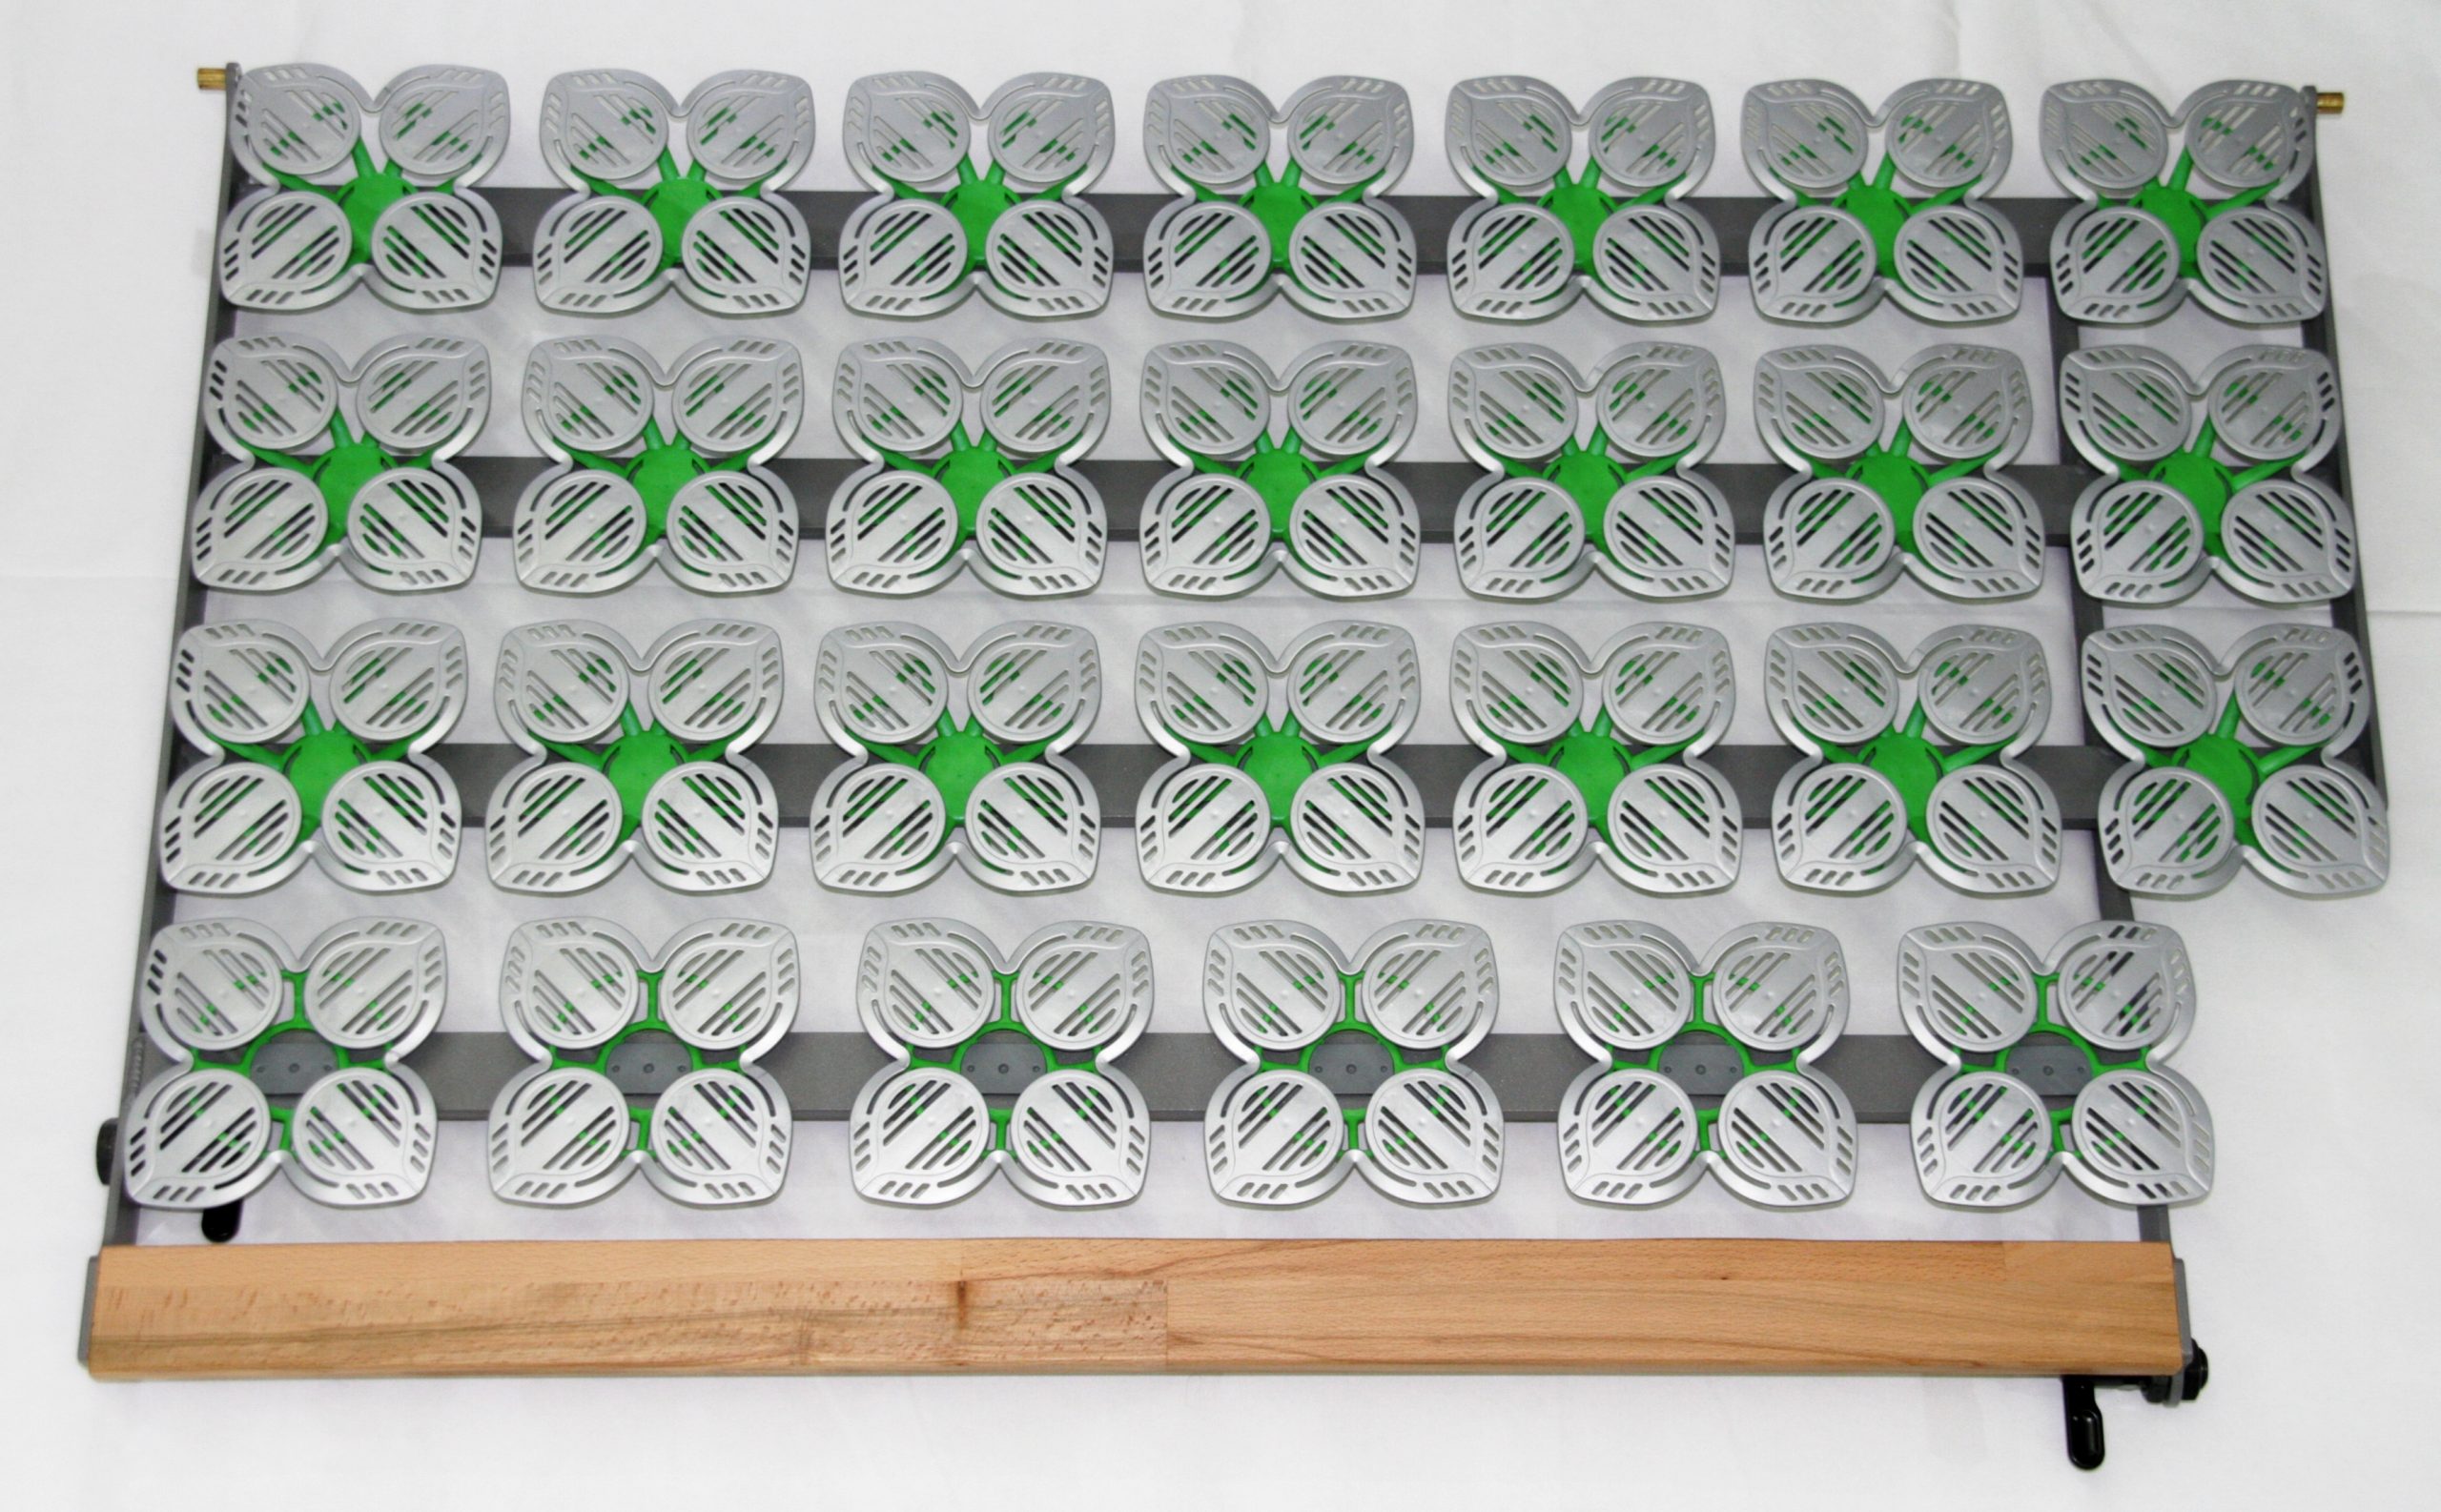
By now, VW offers an upgrade set. Here, we can have it for about € 600.-, incl. installation. Already very soon after VW's announcement of the 6.1, the german firm Squergo offered an upgrade kit. Incl. shipping it costs around € 320.- and supposedly it can be installed by yourself in about 1.5 hrs, without the need to remove the roof tent or inner roof lining. It looks like this:
Since the announcement of the disc system by VW, an extensive thread emanated on the german Caliboard forum about the possibilities of an upgrade.
The common opinion there is that the Squergo system is more comfortable and versatile than the VW upgrade. The Squergo system has a bigger spring depth and can have a thicker mattress than the VW system. Also, Squergo offers different disc springs (weaker/stronger, higher/lower springs), so one can more easily adapt the system to individual needs, e.g. more or less lumbar or shoulder support, etc. The german forum has a good story about a man weighing 120 kg with a wife weighing 60 kg who can now both sleep comfortably upstairs without the bed being too soft for the one, or too hard for the other. The VW system cannot be adapted to individual needs.
So, we decided to go for the Squergo system.
Those who know us better know we are not THAT versatile DIY'ers, but this little Youtube movie gave us the necessary trust we could do it:
So we have ordered the upgrade kit from Squergo, ordered a riveting thingy from Amazon (?? never riveted anything in our life before...), everything supposed to be delivered the coming week... Then wait for a morning or afternoon of good weather so we can put the van in front with the roof up, and go to work...
To be continued...
Last edited: